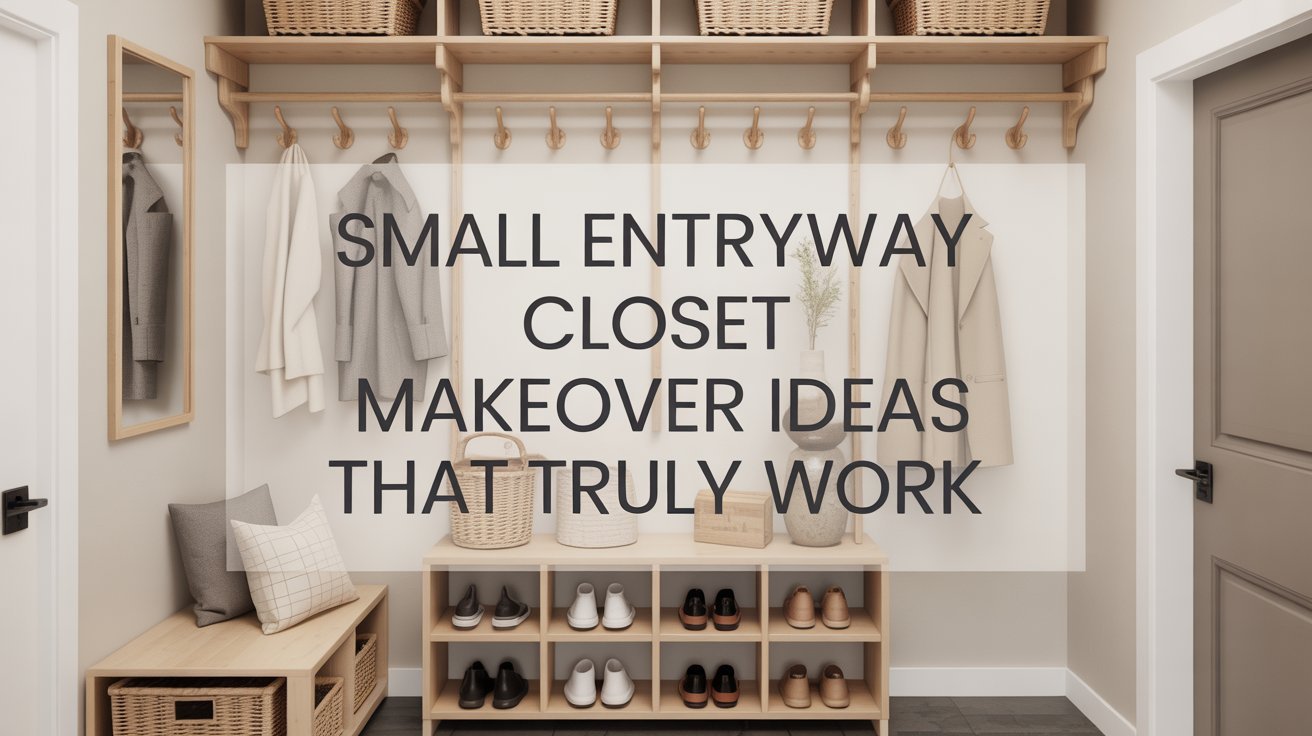
Your entryway closet is probably a mess. Coats pile up on the floor, shoes scatter everywhere, and you can never find what you need when rushing out the door. Sound familiar?
A small entryway closet makeover can fix these problems. You don’t need a huge budget or weeks of work. With smart planning and simple changes, you can turn that cluttered space into an organized system that actually works.
In this guide, you’ll find practical ideas to reorganize your closet. We’ll show you how to add more storage, utilize vertical space more effectively, and keep everything organized and neat. You’ll also get tips on materials, costs, and how to do the work yourself. Let’s make your entryway work for you.
Why Your Entryway Closet Deserves Attention
Your entryway is the first thing guests see when they visit. It’s also the space your family uses every single day. When this area stays messy, it sets a stressful tone for your whole home.
Small homes need smart storage solutions. Every square foot counts. Your entryway closet might only be a few feet wide, but with the right setup, it can hold coats, shoes, cleaning supplies, and outdoor gear without feeling cramped.
Fixing up this space costs way less than bigger home projects. You can complete a small entryway closet makeover for under $500, and some ideas cost even less. The daily benefit of having everything organized and easy to find makes this one of the best improvements you can make.
Creative Small Entryway Closet Makeover Ideas
Ready to get started? Here are seven proven ways to improve your closet space. Pick the ones that fit your needs and budget.
1. Replace Wire Shelving with Custom Wood Shelves
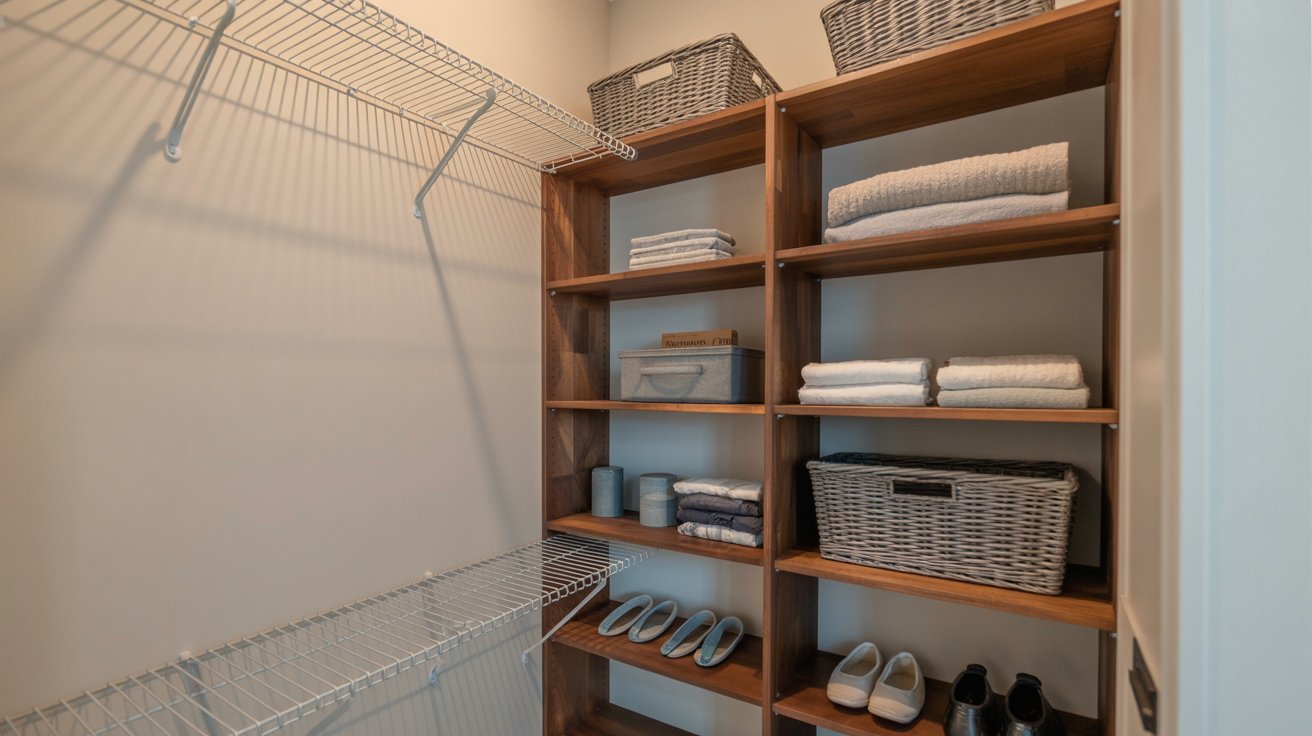
Builder-grade wire shelves look cheap and don’t hold weight well. They bend, sag, and let small items fall through the gaps. Ripping them out is the first step to a better closet.
Install 2×3 wood boards as supports along your walls. Use drywall anchors where you can’t hit studs. Then add stained wood shelves on top. Dark walnut stain looks great and hides dirt. You’ll get stronger shelves that can hold more weight, and you can cut them to fit your exact space.
2. Install an Elfa or Modular Shelving System
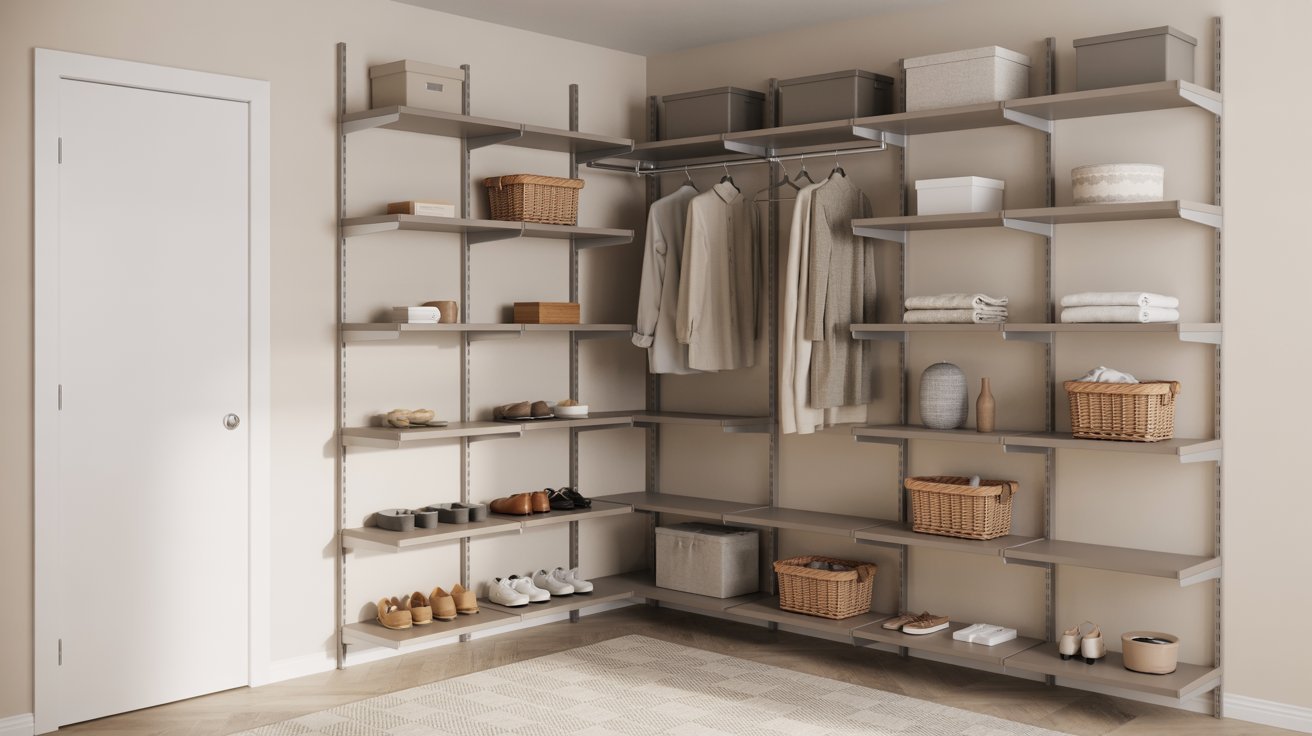
Professional closet systems give you the most flexibility. These kits come with metal tracks that mount to your wall. Then you attach vertical bars and shelves wherever you need them.
The best part? You can move everything around later. As your storage needs change, just unhook the shelves and bars, then reposition them.
These systems work great for families who need to adjust their setup over time. They cost more upfront but save money in the long run because you won’t need to buy new furniture.
3. Add Hanging Fabric Storage Organizers
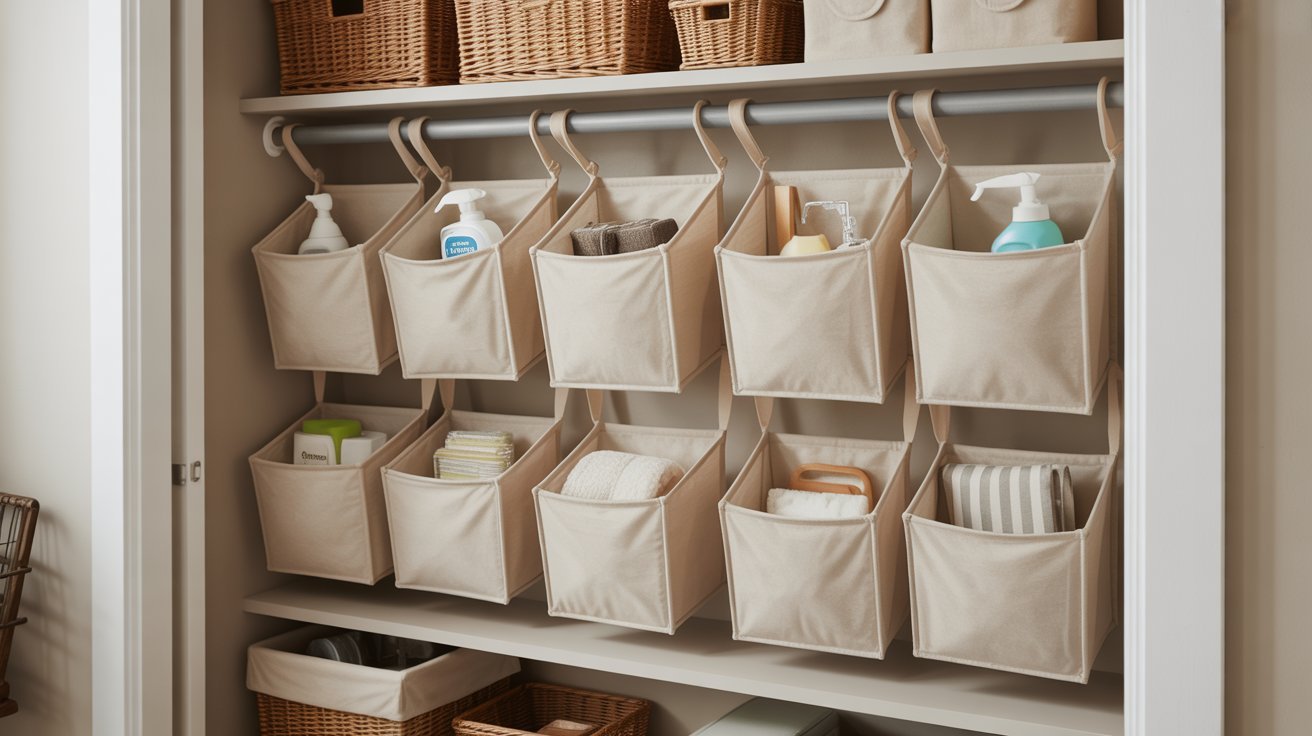
Fabric organizers are cheap and easy to install. They hang from your closet rod and have multiple cubbies for different items. You can find them for under $15 at most stores.
Use these for vacuum attachments, mop pads, cleaning cloths, and other small accessories. Mix them with baskets and bins to create a system that fits what you own.
This works especially well when you’re on a tight budget but still want your small entryway closet makeover to look good.
4. Maximize Vertical Space with Double Hanging Rods
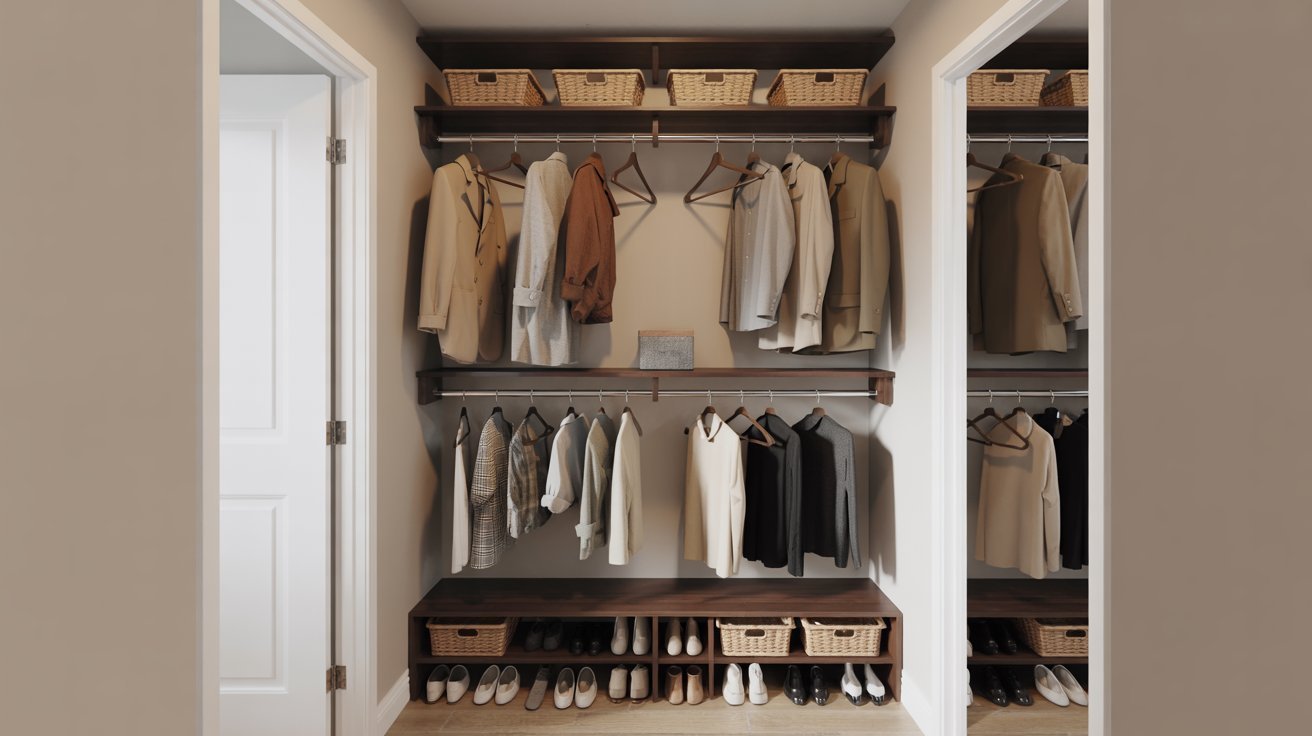
Most closets waste the space under your hanging clothes. Add a second rod below your main one to double your hanging capacity.
The top rod holds your longer coats and jackets. The bottom rod gives you room for shorter items.
This setup works best when your ceiling is 7 feet tall or higher. You’ll still have floor space underneath for shoes or baskets. Even in a tiny closet, going vertical makes a huge difference in how much you can store.
5. Incorporate Wall-Mounted Organizers for Tools
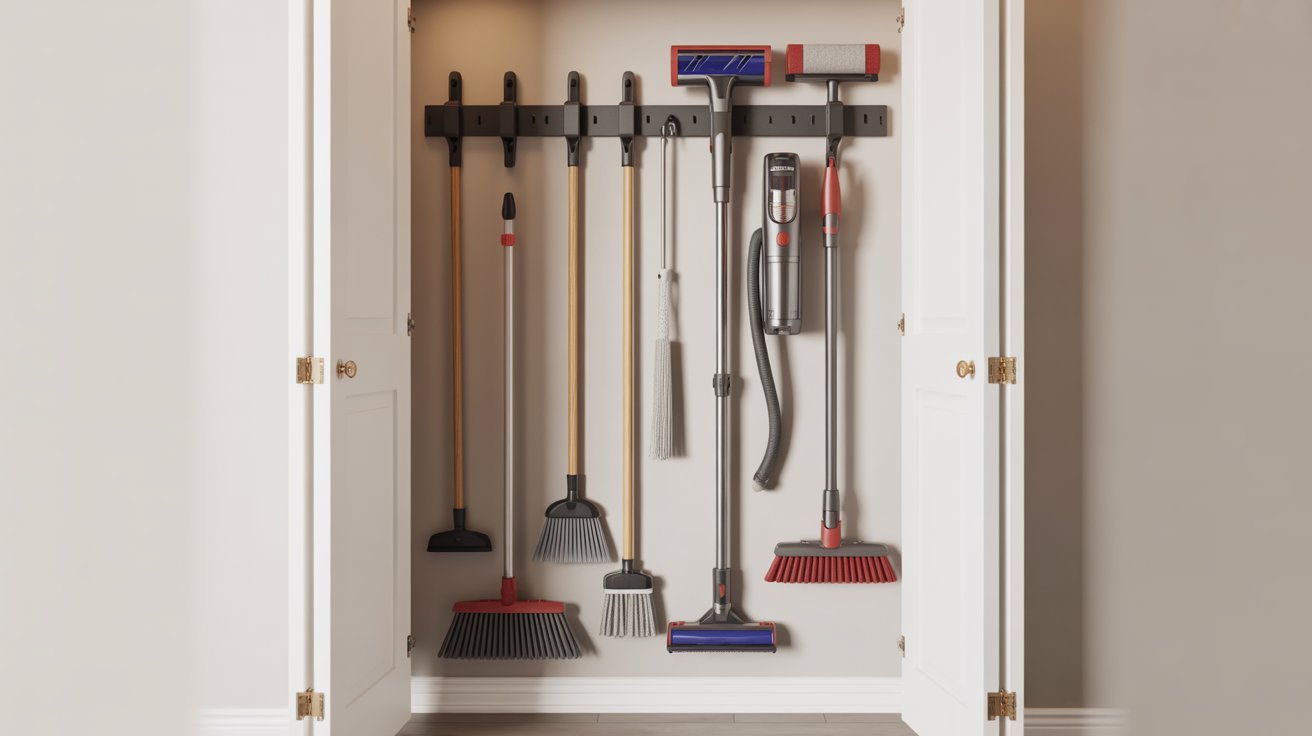
Cleaning tools take up too much floor space when you lean them against the wall. Mount broom and mop holders to your closet’s side walls instead. You can also install a dock for cordless vacuums.
Everything stays off the ground and is easy to grab. No more tools falling over or getting tangled together. This simple change frees up the entire floor for other storage needs.
Your small entryway closet makeover will feel twice as big with clear floor space.
6. Use Baskets and Bins for Small Items
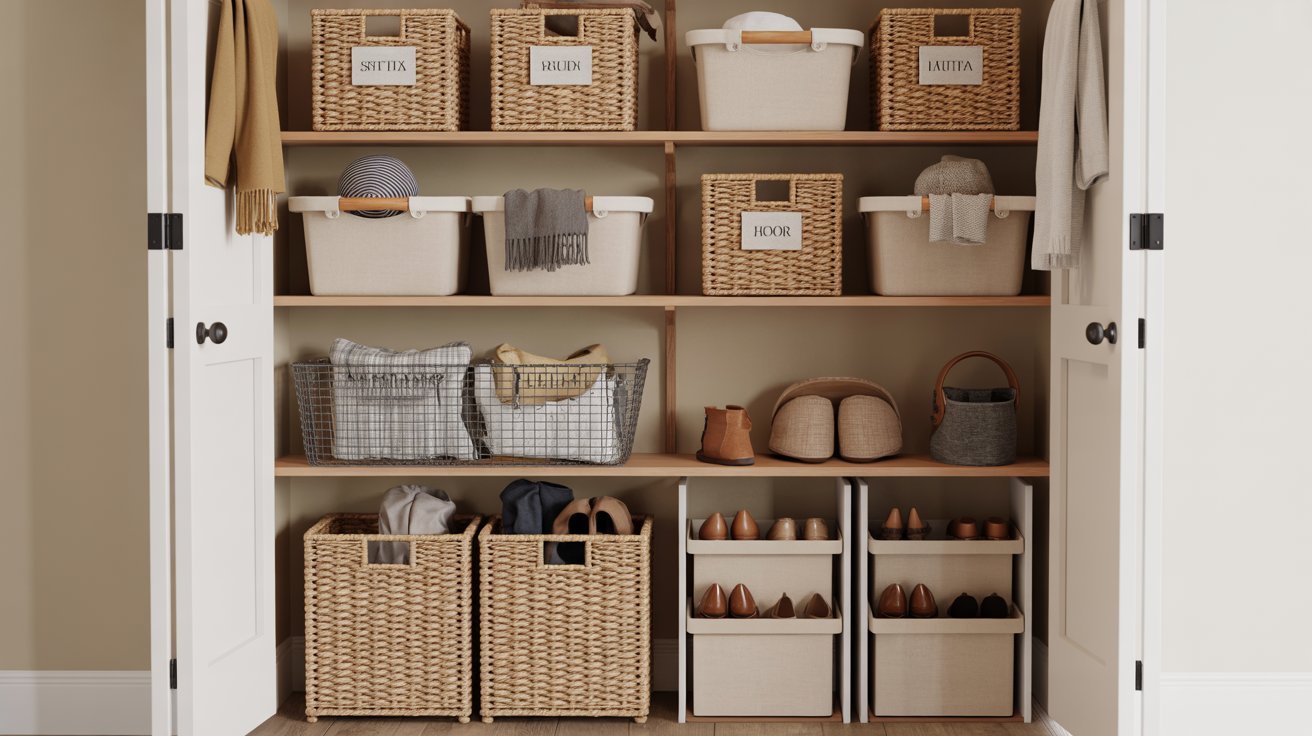
Small things like gloves, scarves, and hats always disappear in closets. Put baskets on your top shelf to hold seasonal accessories. Use fabric boxes for caps and beanies. Try vertical shoe storage baskets on the floor.
Label everything with tags so everyone in your family knows where things go. Clear or woven baskets look nice and let you see what’s inside.
This method keeps your shelves tidy and makes it simple to find exactly what you need.
7. Create a Designated Shoe Storage Area
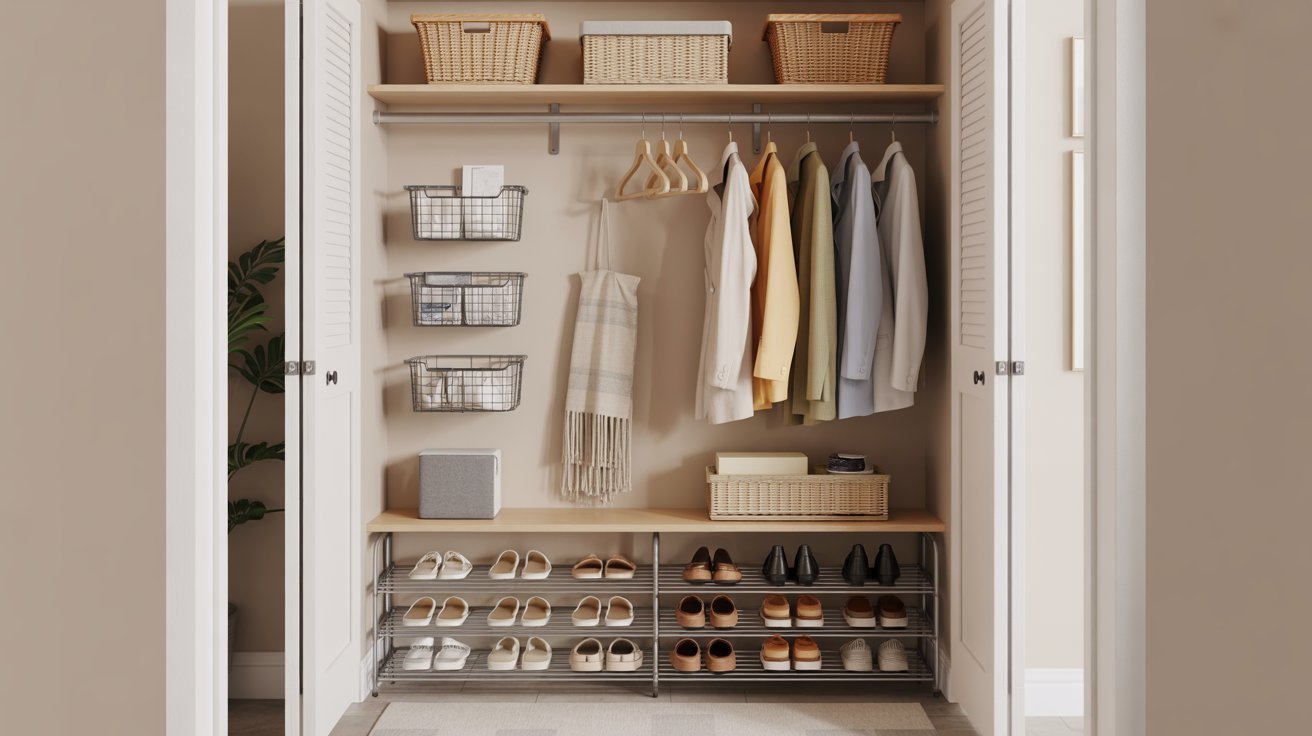
Shoes pile up fast in an entryway. Set up a specific zone just for footwear. Put a shoe rack under your hanging clothes where there’s usually wasted space.
Use baskets for flip flops and slippers that don’t need a rack.
When floor space runs out, go vertical with over-the-door organizers or wall-mounted cubbies. Keep outdoor shoes separate from indoor ones to prevent tracking dirt through your house.
A clear shoe system stops the chaos before it starts.
Essential Tips for Your Closet Makeover
Before you start your project, these tips will help you avoid common mistakes and get better results.
- Plan Before You Paint: Apply fresh white or neutral paint before installing any systems. Painting around shelves and organizers is nearly impossible. A clean coat of paint makes even basic storage look professional.
- Measure Twice, Cut Once: Write down your exact dimensions before buying materials. Measure the height, width, and depth of your closet. Check for outlets, light switches, or vents that might get in the way.
- Think About Daily Use: Put items you grab every day at eye level. Store seasonal or rarely used things on high shelves. This makes your routine faster and easier.
- Don’t Over Secure Shelves: Leave a little flexibility in your setup. You might want to adjust heights later as your needs change. Permanent installations make future updates harder.
- Invest in Quality Hangers: Slim felt hangers save 30 to 40 percent more space than bulky plastic ones. This simple switch lets you fit more coats in the same area.
- Consider Your Ceiling Height: Tall ceilings give you room to stack storage high. Even if your door frame is short, the space above can hold lightweight items like off-season gear.
- Create Zones: Separate your closet into areas. One for coats, one for cleaning supplies, one for shoes, and one for accessories. This stops everything from mixing.
- Shop During Sales: Wait for Container Store’s annual 30 percent off event. Buy hangers in bulk at Costco. Smart shopping cuts your costs way down.
- Use Every Inch: Add hooks to the inside of your door. Mount shelves on side walls. Put a narrow shelf above the door frame. Small spaces need creative thinking.
- Keep It Simple: A functional design beats a complicated one. Don’t add features you won’t actually use. Stick with storage that matches how you really live.
Following these guidelines will help your small entryway closet makeover go smoothly. Start with the basics, then add extras if you need them.
Conclusion
A small entryway closet makeover doesn’t require a contractor or thousands of dollars. With basic tools and smart planning, you can completely change how this space functions. Even one or two of these ideas will make a noticeable difference.
Start by measuring your closet and deciding which problems bother you most. Maybe you need more shoe storage, or maybe your coats need a better system. Pick the solution that fixes your biggest headache first.
Remember that staying organized is ongoing work. Set aside time each season to sort through items and donate what you don’t use. Every few months, check if your system still works or needs small adjustments. Making the most of your space takes effort, but the daily convenience is worth it. Start planning your closet update today and enjoy a cleaner, calmer entryway tomorrow.
Frequently Asked Questions
How Much Does a Small Entryway Closet Makeover Cost?
Budget projects start around $50 for basic supplies like paint, hooks, and fabric organizers. Full makeovers with wood shelving or modular systems run $200 to $500. DIY installations cost much less than hiring professionals to do the work.
Can I Complete This Project in One Weekend?
Yes, most people finish in one or two days. Plan your design on Friday evening, paint on Saturday morning, and install your new system Saturday afternoon and Sunday. Give the paint enough time to dry before adding shelves or organizers.
What Tools Do I Need for Installation?
Grab a power drill, level, stud finder, and measuring tape. You’ll also want drywall anchors for spots where you can’t hit studs. A pencil and painter’s tape help mark where everything goes. Most households already own these basic tools.
How Do I Maintain Organization After the Makeover?
Clean out your closet every three months. Get rid of items you haven’t used in a year. When you buy something new, remove something old to keep the space balanced. Rotate seasonal items like winter coats and summer gear regularly.
Will removing Built wire Shelving Damage My Walls?
You’ll have small holes where the brackets are attached. Fill these with spackle and sand them smooth. Touch up with matching paint after the spackle dries. The damage is minimal and easy to fix with careful removal and basic supplies.
Leave a Reply